POI Grouping / Work Pack Creation
Welcome to the complete user guide for the POI Grouping Tool within Abyss Fabric. Whether you're just getting started or are already familiar with the tool, this guide is crafted to enhance your experience in grouping Points of Interest (POIs) into workpacks. We've thoroughly outlined the steps for grouping POIs, handling workpacks, and leveraging the latest features for remediating and creating new workpacks. This guide equips you with all the knowledge you need to effectively organize, manage, and optimize your POI workpacks within Abyss Fabric.
POI Grouping Interface
After selecting a platform, you'll be taken to the “Insights” page, where you’ll find an overview of the components linked to that platform.
To view Workpacks, navigate to the “Point of Interest” Tab within the Insights page
Select view by “Workpack” option.
Filter Workpacks by defects
Utilize this feature to view workpacks based on the specific defects they contain.
By filtering for defects within the Workpack Management section, you can easily identify and access workpacks that address those particular defects.
View POIs within a Workpack
To view the Points of Interest (POIs) associated with a specific Workpack, click on the down arrow next to the Workpack name. This action will display the list of POIs linked to that Workpack.
You can filter the displayed POIs based on various criteria such as Paint Block, Verification, Accessibility, and Status. Use the filter options available above the list of POIs to narrow down your search and focus on the most relevant entries.
Click on any POI from the list to open a detailed information panel on the right side of the screen. This panel will display all relevant details about the selected POI, including its name, component, status, accessibility, and any comments associated with it.
Locate a workpack associated with a specific asset.
To locate the workpacks associated with a specific asset, navigate to the left-hand panel section within Abyss Fabric.
Use the “Equipment Tag” option to find the asset in question, and click on “Apply Query”
The system will display the corresponding workpack along with all related Points of Interest.
Creating a new Workpack
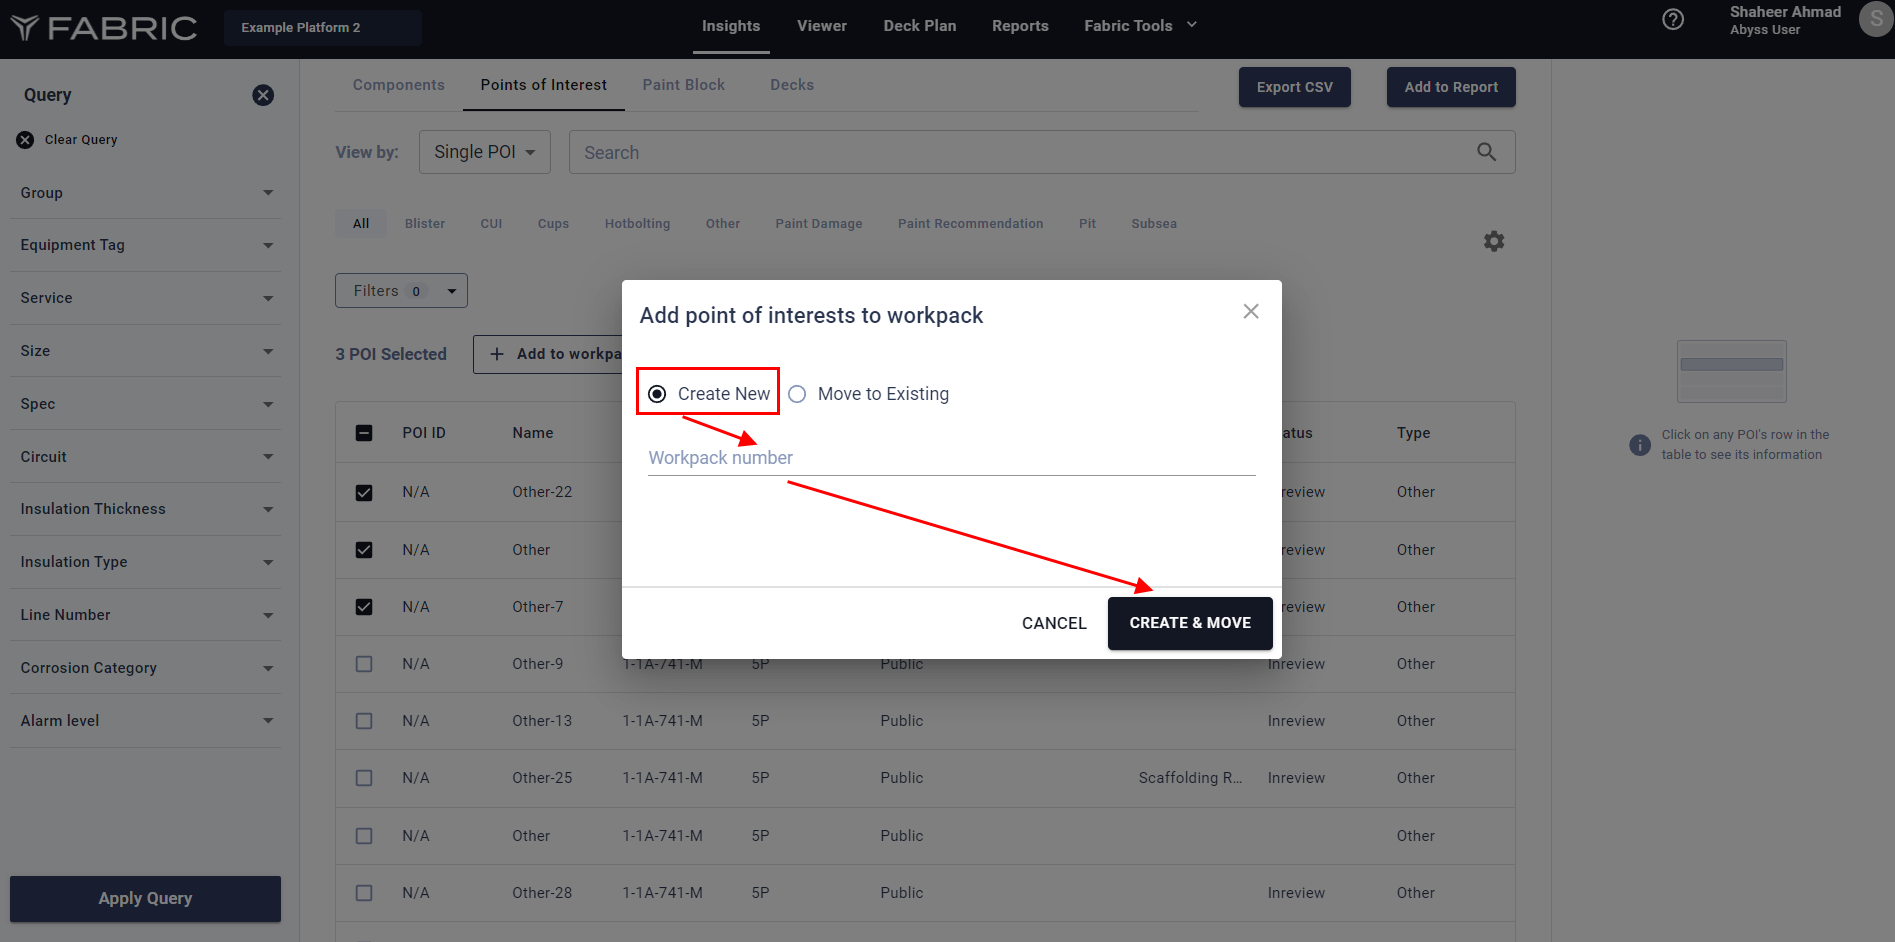
Begin by selecting the option “ Single POI “ to view POIs individually.
Select the specific POIs you want to include in the new Workpack.
Click on the "Add to Workpack" button..
Enter a name for the new Workpack and click "Create and Move" to finish the process.

Adding POI to an existing Workpack
Click on “Move to Existing” Option.
Type in the number of the existing Workpack to which you want to add the POIs.
Finalize by clicking "Move" to add the POIs to the selected Workpack.
Setting the POI Visibility
Choose the POIs for which you want to modify the visibility settings.
Click the "POI Visibility" button to open the visibility settings.
A pop-up will appear, allowing you to make the POI visible to a specific group. Select the desired group and click "Confirm" to apply the changes.
Edit and Delete a Workpack
Use the "Edit" option to rename the Workpack as needed.
Select the "Delete" option to remove the Workpack. All linked POIs will be moved to the "Unassigned" category.
Updating status of a Workpack
Click on the status dropdown menu to update the status of the Workpack.
Choose the appropriate status from the available options to apply the update.
Enable/Disable the POI Columns
Choose the specific columns you want to display, such as POI ID, Paint Block, Accessibility, or Status etc.
Click the "Apply" button to confirm and display the selected columns.
